In modern VMware Cloud Foundation (VCF) environments, consistent automation is essential for ensuring security, compliance, and operational efficiency. VMware Operations Orchestrator integrates directly with VCF Operations to unlock powerful, out-of-the-box workflows that automate common tasks — such as enforcing SSH policies on ESXi hosts — with just the push of a button.
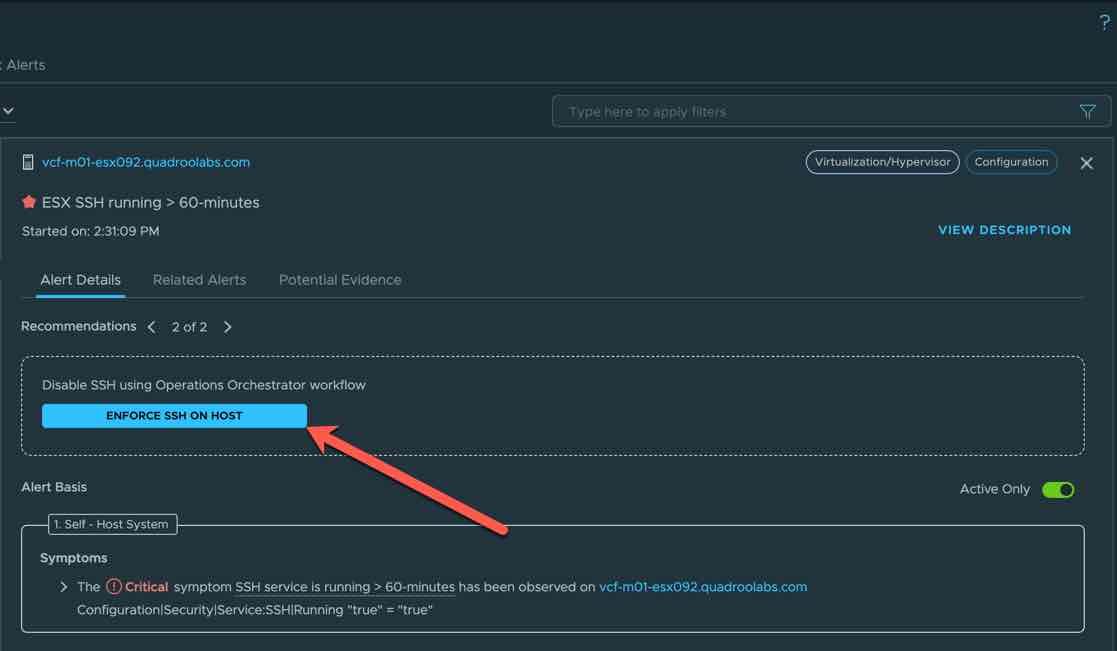
In this article, we’ll walk through the steps to deploy the Operations Orchestrator appliance and configure the VCF Operations Management Pack, enabling you to quickly tap into integrated automation capabilities and simplify your day-to-day operations. For example, when an alert is triggered in VCF Operations, the recommended remediation may include launching an Orchestrator workflow. With a single click, you can stop the SSH service and disable it from starting on future reboots. In a future post, I’ll show you how to automate that process entirely!
Download the Orchestrator Appliance
The latest Orchestrator OVA can be downloaded from Broadcom’s support portal: Download the Orchestrator OVA
Install the OVA to a vCenter System
Deploy the OVA using the vCenter deployment wizard. During the process, do not configure NTP in the wizard. NTP should be configured post-deployment to avoid bring-up issues.
Enable Root Login (Optional)
If permitted by your security policy, you can enable SSH access for the root user. I do this temporarily in my lab to enable copy/paste.
- Open the VM console via vCenter.
- Log in as
rootusing the password configured during installation. - Edit the SSH configuration file. In this example, I use
vi: - Restart the SSH service:
vi /etc/ssh/sshd_configLocate the line:
PermitRootLogin noAnd change it to:
PermitRootLogin yesSave and exit:
<Esc> :wqsystemctl restart sshdNow you should be able to log in using your preferred SSH client.
Configure the Authentication Source
Now, connect Orchestrator to the authentication source (e.g., VCF SSO). Run the following CLI command from the Orchestrator appliance:
vracli vro authentication set -p vidb \
--hostname https://<VCF SSO Other Components URL> \
--client-id '<Client ID from Ops>' \
--client-secret '<Client Secret from Ops>' \
--admin-group <SSO Admin Group> \
--admin-group-domain=<SSO Domain>
Example using SSO via LDAPS with Microsoft AD:
vracli vro authentication set -p vidb \
--hostname https://vc1.quadroolabs.com/acs/t/CUSTOMER \
--client-id '9a5ce5a6-a590-4c63-93c1-082e7ec3dff8' \
--client-secret 'rAlTWHNU0yvwdPPRcSG4vhKh82PxB0gI' \
--admin-group Administrators \
--admin-group-domain=quadroolabs.com
Once the authentication is configured, the Orchestrator must be re-started in order to pick-up the changes. Execute the following:
/opt/scripts/deploy.shCritical Step: Enable Basic Authentication
To enable basic authentication (required for management pack connectivity):
- Go to the Orchestrator web interface:
https://<Orchestrator FQDN> - Log in with an SSO domain account, configured in the previous step.
- Navigate to: System Settings → Configuration Properties
- Click Add Property and enter:
- Key:
com.vmware.o11n.sso.basic-authentication.enabled - Value:
true
- Key:
Once this change is saved, the Orchestrator will automatically restart its services after ~60 seconds. Expect full restart to take about 8–10 minutes.

Download and Configure the Management Pack
- In VCF Operations, go to: Administration → Integrations
- Select Marketplace and search for “VMware Cloud Foundation Management Pack for Orchestrator“
- Download and then install the pack.
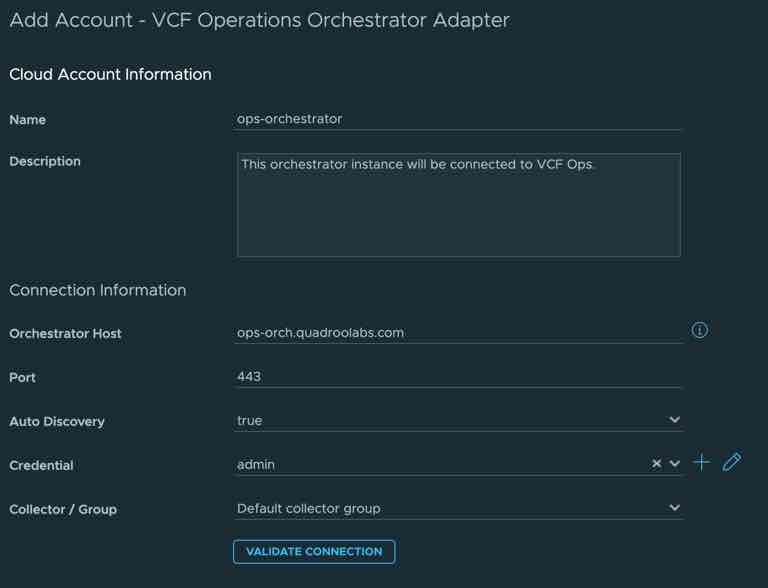
- Once installed, go to the Administration → Integrations → Repository tab, select the new pack, and click Add Account.
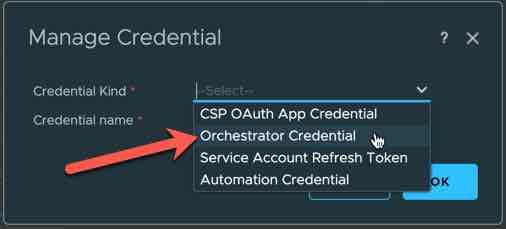
- Fill in the required details, making sure to use the Credential Kind Orchestrator Credential and then validate the connection.
Make sure to use the Credential Kind – Orchestrator Credential
You’re Done!
The Orchestrator is now integrated into VCF Operations. Stay tuned for upcoming blog posts covering advanced configuration options and real-world use cases.

Leave a comment